How to Install a Sliding Door Step by Step in 2026?
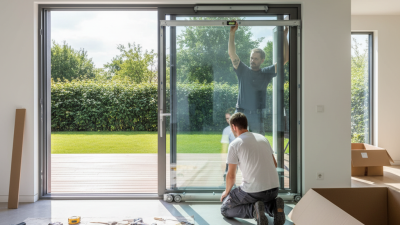
Installing a sliding door looks simple until the panel refuses to roll, the lock misses its strike, or rain appears beneath the track. This guide explains sliding door installation in practical stages, from measuring the rough opening to sealing the final screw holes. Expect dust, shims, and at least one measurement worth checking twice.
The U.S. Department of Energy reports that windows account for about 25%–30% of residential heating and cooling energy use. A poorly fitted glass door can contribute to similar comfort and efficiency problems. ENERGY STAR also emphasizes correct sizing, weatherstripping, and professional installation for improved performance. These figures concern windows and glazed openings broadly, not sliding doors alone. That distinction matters.
Building scientist and fenestration consultant Mark Meshulam often explains the central risk this way: “The installation is usually more important than the product.” His point applies directly here. A premium door can still leak when the sill slopes incorrectly or the flashing is incomplete. I have seen installers focus on smooth movement while overlooking water management. That is a costly mistake.
This 2026 step-by-step guide combines manufacturer instructions, current energy guidance, and field-tested checks. It covers tools, opening preparation, panel placement, adjustment, insulation, drainage, and final testing. You will learn what should feel smooth, what should look square, and when a minor gap signals a larger problem. Some projects will not go perfectly. Rechecking the opening is often wiser than forcing the door into place.
Assess the Opening, Door Type, and Installation Requirements
How to Install a Sliding Door Step by Step in 2026?
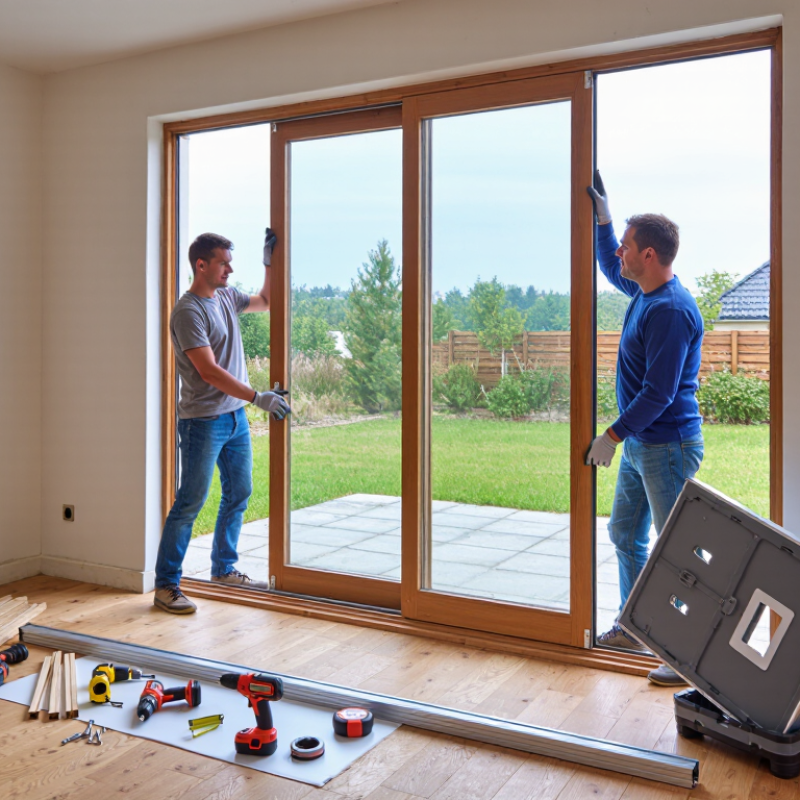
Assess the opening before ordering the door. Measure width at the top, middle, and bottom. Measure height at both jambs and the center. Record the smallest measurement. Measure twice. Do not guess.
Check the sill with a 1.8-meter level. A small slope can make rollers bind and create uneven gaps. Inspect the header, studs, and subfloor for movement, moisture, or rot. I have seen attractive doors fail because the opening was never truly square.
Choose the door type after reviewing the opening.
A bypass door needs parallel tracks and sufficient wall clearance. A pocket door requires deeper framing and careful checks for pipes, cables, and structural supports. A hinged replacement is different again.
The rough opening must match the installation manual, not a generic online chart. Confirm panel weight, track capacity, safety-glass requirements, drainage details, and the installer’s skill level. Local building rules may also require specific structural or glazing provisions.
Energy performance deserves attention.
The U.S. Department of Energy states that windows can represent 25–30% of household heating and cooling energy use. A poorly sealed sliding door can worsen that loss. The U.S. Energy Information Administration’s 2020 Residential Energy Consumption Survey reported that space heating used 42% of household energy, while cooling used 9%.
Check the unit’s U-factor, solar heat gain coefficient, weather seals, and sill pan design.
My weak point is rushing the final adjustment. I now test the panel repeatedly, inspect daylight around the seal, and correct friction before trimming the casing.
Gather Tools, Materials, and Safety Equipment
Before installing a sliding door, prepare every tool, material, and safety item in one accessible area. You will need a tape measure, spirit level, drill, compatible bits, screwdrivers, a utility knife, shims, a pry bar, and a caulking gun. Keep spare fasteners nearby. Missing one screw can interrupt the entire installation.
Set out the door panel, frame, track, rollers, handles, weatherstripping, sealant, and approved fixing hardware. Confirm each part matches the installation instructions and measure the opening twice. A slightly wrong measurement can create binding or air leaks. I once trusted an old tape measure and had to correct the frame later. That was avoidable.
Wear cut-resistant gloves, safety glasses, sturdy footwear, and hearing protection when drilling. Add a dust mask if the wall releases debris. Large glass panels need two people, even when they appear manageable. Protect the floor with a thick blanket, not loose cardboard. Check the wall for wiring or plumbing before drilling, and inspect the opening for rot, movement, or moisture. If the structure feels weak, pause and seek qualified advice. Perfect preparation is difficult, but rushing makes small mistakes expensive.
How to Install a Sliding Door Step by Step in 2026? - Gather Tools, Materials, and Safety Equipment
| Step | Installation Phase | Tools and Equipment | Materials and Typical Quantity | Key Actions | Safety Requirements | Estimated Time |
|---|---|---|---|---|---|---|
| 1 | Measure and Inspect the Opening | Tape measure Spirit level Pencil Stud finder |
|
Measure the opening width, height, and wall thickness at several points. Confirm that the floor and wall are reasonably plumb and level. Locate studs or suitable structural fixing points. | Keep the work area clear of furniture and trip hazards. Do not proceed until hidden electrical cables and plumbing routes have been considered. | 20–30 min |
| 2 | Gather Tools, Materials, and Safety Equipment | Drill/driver Drill bits Screwdriver Wrench Utility knife Clamps |
|
Check that the track, rollers, stops, anti-jump devices, guides, fasteners, and instructions are present. Verify that every fastener is rated for the wall structure and door weight. | Wear safety glasses, work gloves, and closed-toe shoes. Use hearing protection when drilling for extended periods. | 10–15 min |
| 3 | Remove Existing Door and Trim | Pry bar Hammer Screwdriver Utility knife |
|
Carefully remove the existing door, hinges, casing, and obstructions. Cut painted joints before removing trim to reduce wall damage. Fill and smooth unwanted holes. | Support heavy door panels with a second person. Watch for sharp nails, screws, splinters, and chipped paint. | 30–60 min |
| 4 | Prepare the Wall and Mounting Backer | Level Stud finder Drill Saw Clamps |
|
Install a continuous structural backer where necessary, aligning it with wall studs. The backer must support the combined weight of the track, rollers, and door panel. | Never rely on drywall anchors alone for a heavy sliding door. Check for concealed services before drilling. | 30–60 min |
| 5 | Mark the Track Position | Tape measure Level Chalk line Pencil |
|
Mark a perfectly level line for the track. Confirm that the door can cover the opening and slide fully without contacting adjacent walls, cabinets, or fixtures. | Recheck all dimensions before drilling. Incorrect track height can cause rubbing, poor sealing, or unsafe movement. | 15–25 min |
| 6 | Install the Track | Drill/driver Level Socket or wrench Clamps |
|
Pre-drill where required, hold the track on the marked line, and tighten fasteners gradually from the center outward. Confirm level after each group of fasteners. | Use a helper to hold long or heavy tracks. Do not place fingers between the track and wall while positioning it. | 30–45 min |
| 7 | Attach Rollers and Door Hardware | Drill Measuring tool Wrench Screwdriver |
|
Position the mounting plates according to the hardware instructions. Install rollers, anti-jump devices, and the handle without overtightening or damaging the door panel. | Lay the door on padded supports. Use two people for glass, solid-core, or oversized panels. Keep the panel secured against tipping. | 25–45 min |
| 8 | Hang the Door Panel | Two-person lifting support Level Wrench |
|
Lift the door onto the track, engage both rollers, and install anti-jump devices. Move the panel slowly to ensure that the rollers are seated correctly. | Keep hands and feet clear of pinch points. Never hang a heavy panel alone or leave it unsecured on the track. | 15–30 min |
| 9 | Install Floor Guide and Door Stops | Pencil Drill Screwdriver Level |
|
Place the floor guide in line with the door panel. Set stops so the door opens and closes at the desired positions without striking walls or trim. | Check the floor for heating pipes, plumbing, and electrical services before drilling. Use suitable anchors for tile, concrete, wood, or another floor type. | 20–35 min |
| 10 | Adjust, Test, and Finish | Level Wrench Cleaning cloth Silicone sealant if specified |
|
Open and close the door several times. Adjust roller height until the panel is level and moves smoothly. Confirm that stops, guides, fasteners, and anti-jump devices remain secure. | Keep children and pets away during testing. Stop use immediately if the door derails, binds, rocks, or produces unusual noise. | 20–30 min |
| 11 | Final Safety Inspection | Flashlight Level Wrench |
|
Verify that the track is level, the door is stable, the panel cannot lift off the track, and the floor guide prevents uncontrolled swinging. Confirm that all screws are tight. | Inspect pinch points and edge clearances. Follow the hardware manufacturer’s load rating and maintenance instructions. | 10–15 min |
Prepare the Wall Opening and Install the Door Frame
Before installing a sliding door, inspect the wall opening carefully. Remove trim and expose the full frame area. Check for electrical cables, plumbing pipes, and signs of moisture. Never cut a load-bearing wall without proper structural advice. Measure the opening at the top, middle, and bottom. Record the smallest width and height. This prevents a frame from fitting tightly in one corner and loosely in another. The rough opening should match the door system’s installation instructions, not a guessed measurement. Leave enough clearance for shims and adjustment.
Build a solid, square opening with straight studs and a properly supported header. Use a long level to check both sides. Even a small lean can make the door roll open by itself. I once trusted a short level and had to correct the frame later. That mistake was avoidable. Install the sill or threshold on a flat, sealed surface, especially near exterior walls. Apply suitable flashing or sealant where local conditions require it. Set the door frame into the opening, then secure it loosely with approved screws. Place shims behind each fixing point, keeping the frame plumb and evenly spaced. Tighten the screws gradually. Over-tightening can twist the frame. Slide the door panel through the opening to test clearance before final fastening. It should move smoothly without scraping. Recheck the diagonals, level, and latch alignment before covering the frame with trim.
Fit the Sliding Track, Rollers, and Door Panel
How to Install a Sliding Door Step by Step in 2026?
Fit the Sliding Track, Rollers, and Door Panel
Measure the opening twice. Record width at three heights and height at three points. Uneven framing is common, even in new construction. Use the smallest measurements when checking clearance. A laser level helps, but a long spirit level remains useful for verification.
Install the sliding track on solid, continuous support. Mark every fixing point before drilling. The track must remain perfectly level; a two-millimeter slope can make the panel drift or bind. Follow the tested fastener spacing in the installation manual. The ANSI/AAMA/WDMA/CSA 101/I.S.2/A440 standard evaluates operating force, air leakage, water penetration, and structural performance, so smooth movement is not merely cosmetic.
Attach the rollers to the door panel, keeping their adjustment screws accessible. Lift the panel into the upper guide, then set the rollers onto the track. Two people are safer here. Adjust each roller gradually until the gap is even from top to bottom. Check that the anti-jump device engages correctly. It should not scrape the track.
Seal the perimeter after testing operation. The U.S. Department of Energy reports that windows can cause 25–30% of household heating and cooling energy use, making alignment and weather seals important. NFRC ratings also show why U-factor and solar heat gain matter. Recheck the latch, drainage path, and panel weight. I once focused too much on level and missed a compressed seal; the door rolled well, but it leaked during heavy rain.
How to Install a Sliding Door Step by Step in 2026?
Fit the sliding track, rollers, and door panel using a common 72-inch-wide by 80-inch-high interior door setup.
The chart shows practical reference dimensions in inches for planning a typical sliding-door installation: a 72-inch door panel, an 80-inch panel height, a 72-inch minimum track length for a single sliding panel, and approximately 2 inches of wall clearance for the rollers and panel. Always confirm the final clearances and hardware requirements against the selected door system.
Adjust, Test, and Secure the Completed Sliding Door
After installing a sliding door, adjust it before judging its performance. Place a 600 mm spirit level against the jamb and head. The bubble should remain centered while the door moves. Turn each roller adjustment gradually, using quarter-turns. The panel should clear the sill without scraping. Keep the gap even from top to bottom. A small misalignment can create friction, rattling, and poor locking.
Test the door several times. Slide it slowly, then close it with normal household pressure. Listen for clicking, dragging, or air movement. The U.S. Department of Energy estimates that uncontrolled air leakage can waste 5% to 30% of household energy use, depending on climate and construction. Check the meeting stile and perimeter seals with a thin strip of paper. If the paper slips out easily, the seal may need repositioning. This simple test is useful, though it is not a substitute for professional inspection.
Secure the completed door with its primary latch, anti-lift device, and a correctly fitted secondary stop. The secondary stop should prevent the panel from opening when the latch is released. Confirm that the lock engages fully without forcing the handle. Test from both sides. Do not rely on a lock that only catches halfway. I have found that the final adjustment is rarely perfect on the first attempt. Recheck it after one day of use, especially if the frame is newly installed or the floor feels uneven. These details follow practical installation principles described in DOE energy guidance and fenestration performance standards published by the National Fenestration Rating Council.
Related Posts
-
10 Best Tips for Sliding Door Installation You Should Know?
-

Top 10 House Windows Replacement Tips You Need to Know?
-

What are Apex Windows Benefits for Global Buyers?
-

The Ultimate Guide to Choosing Stylish Patio Windows for Your Home
-
Top 10 Benefits of Door and Window Replacement for Homeowners?
-

Why You Should Take Advantage of Window Deals Today?