
10 Tips for Home Window Replacement Buyers?
Replacing windows can improve comfort, daylight, noise control, and household energy performance. Yet choosing products without a clear plan can create expensive regrets.
This guide explores ten practical tips for home windows replacement buyers. It begins with the building itself, not a glossy product label. Check frame condition, wall moisture, glass type, opening size, and installation access. Measure twice. Small details matter. A draft near one corner may indicate poor sealing, not weak glass. Experienced installers usually inspect these clues before recommending a package. Ask for written specifications, including U-factor, solar heat gain coefficient, frame material, warranty coverage, and labor responsibility. Independent ratings from recognized testing organizations can make comparisons more reliable. Local climate also matters; a sunny room may need different glass than a shaded bedroom.
Budgeting requires more than comparing sticker prices. Include removal, disposal, trim repairs, permits where applicable, finishing, and future maintenance. Request itemized estimates from several established contractors. Verify references carefully, and ask to see a recent installation if possible. Watch the work, but do not assume every confident salesperson is an expert. I have seen attractive windows installed badly, with uneven gaps and foam exposed to weather. That mistake can reduce performance quickly. No guide replaces a qualified site assessment. Still, these tips can help buyers ask sharper questions, recognize vague promises, and choose improvements that fit their home, climate, and long-term plans.
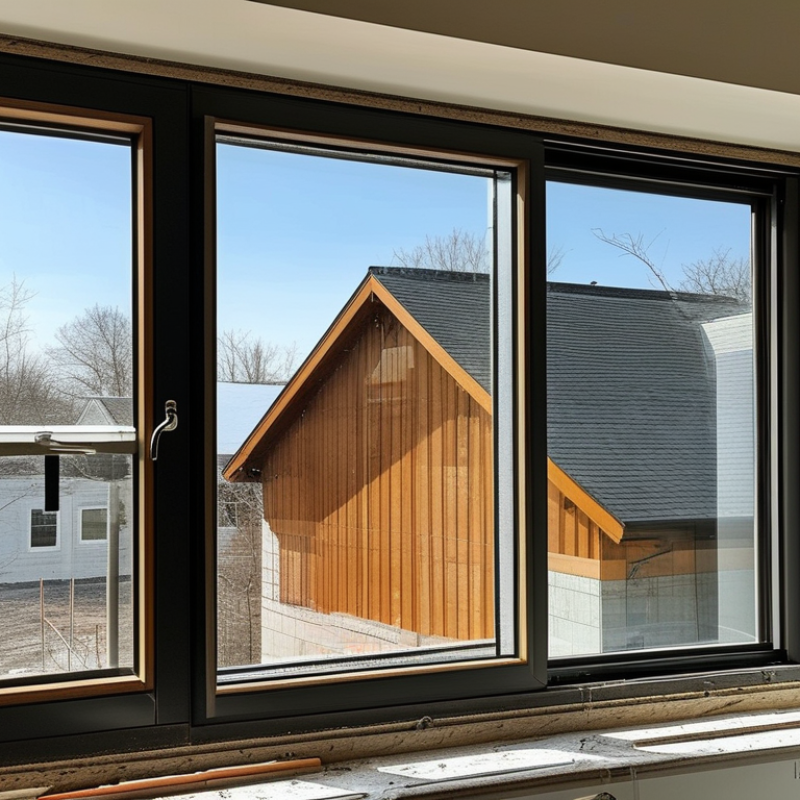
Define Your Window Replacement Needs and Project Goals
10 Tips for Home Window Replacement Buyers
Define Your Window Replacement Needs and Project Goals
Before measuring glass or comparing quotes, decide what the windows must improve. Is the room drafty, noisy, difficult to clean, or unsafe for children? Walk through the house on a windy morning. Note cold air near the frames, condensation on the glass, and sunlight that fades furniture. These observations create a more useful project brief than a vague goal like “better windows.”
Your budget should include installation, interior repairs, disposal, and possible structural work. A low estimate may exclude important details. I once saw a replacement plan that looked affordable until damaged trim appeared beneath the old frame. That estimate was too optimistic. Ask how the installer will handle uneven openings, water control, and wall finishes. Request written measurements and clear explanations for every allowance.
Think about daily use, not only appearance. A large window may brighten a kitchen, but it can be difficult to open above a sink. Consider ventilation, emergency exit requirements, privacy, security, and cleaning access. Check whether local rules affect window size or placement. Keep photographs of each opening and mark rooms on a simple floor plan. Small details matter. You may also need to revise the plan after the first inspection. That is not failure; it is useful evidence.
Compare Window Styles, Materials, Glass Options, and Energy Ratings
Choosing replacement windows starts with the opening, not the brochure. Double-hung windows suit traditional rooms and allow controlled airflow from two sashes. Casement windows usually seal tightly and direct breezes inward. Sliding windows need less exterior clearance, but their horizontal tracks can collect dust. Measure the frame, wall depth, and nearby furniture before choosing a style. A beautiful window that hits a cabinet is still a poor decision.
Material changes maintenance and comfort. Vinyl frames resist peeling and usually cost less, while fiberglass offers strong dimensional stability. Wood provides a warm interior finish but demands careful moisture control. Composite materials can balance appearance and durability, although product quality varies. I would inspect corner joints, drainage paths, and locking hardware in person. Photos hide small defects.
Glass deserves closer attention than frame color. The U.S. Department of Energy reports that windows can account for 25–30% of residential heating and cooling energy use. Compare U-factor for insulation and solar heat gain coefficient for sunlight control. Lower U-factor generally reduces heat transfer; lower SHGC can help in sunny climates. The National Fenestration Rating Council explains these ratings on standardized labels. Low-emissivity coatings and double glazing often improve comfort near cold glass. Triple glazing may help in severe climates, but added weight and cost need evaluation. I once assumed the highest rating was automatically best. It was not. Orientation, shade, climate, and installation quality can change the result. Ask for documented performance data, warranty limits, and an installation plan.
Measure Openings Accurately and Check Installation Requirements
10 Tips for Home Window Replacement Buyers
Measure each opening in three places: top, middle, and bottom. Record width and height separately. Use the smallest measurement, not the average. Check the frame for bowed jambs, loose trim, or water stains. A steel tape works better than a soft measuring tape. Leave installation clearance only when the manufacturer specifies it. Guessing here can create gaps, binding, or expensive changes.
Tip 1: Measure from the existing frame, not the interior casing. Tip 2: Photograph each opening before ordering. The U.S. Department of Energy reports that windows can represent 25–30% of residential heating and cooling energy use. Poor sizing can weaken both comfort and energy performance.
Review installation requirements before selecting a product. Confirm rough-opening dimensions, sill conditions, drainage paths, insulation space, and fastening locations. The National Fenestration Rating Council explains that U-factor and solar heat gain coefficient describe different performance factors. A low U-factor may help in cold weather, while suitable solar control matters in hot rooms. Local energy codes can also change required ratings. Ask for written details. Verbal promises fade.
Tip 3: Check whether the wall needs flashing repairs first. Tip 4: Confirm who handles interior trim and exterior sealing. I have seen accurate measurements fail because the sill was not level. That small mistake can affect operation, air leakage, and long-term water resistance. Even experienced installers should recheck the opening before removing the old window.
10 Tips for Home Window Replacement Buyers: Measure Openings Accurately and Check Installation Requirements
| No. | Buying Tip | What to Measure or Check | Practical Requirement | Why It Matters | Record |
|---|---|---|---|---|---|
| 1 | Measure width in three places | Measure the inside width at the top, middle, and bottom of the opening. | Use the smallest measurement when determining the replacement unit size. | Openings can be slightly out of square, and the smallest dimension helps prevent an oversized order. | W1 / W2 / W3 |
| 2 | Measure height in three places | Measure from the lowest point of the sill to the top of the opening at the left, center, and right. | Use the smallest height for ordering and allow only the manufacturer’s recommended installation clearance. | An accurate height measurement supports proper shimming, leveling, and operation. | H1 / H2 / H3 |
| 3 | Check the opening for square | Measure both diagonal distances from corner to corner. | A smaller difference between the diagonals indicates a more square opening; record the actual difference. | A significantly uneven opening may require additional shimming, adjustment, or reframing. | D1 − D2 |
| 4 | Identify the frame type | Determine whether the project uses a replacement insert, a full-frame unit, or a new-construction-style frame. | Confirm whether the existing frame, trim, sill, and exterior finish will remain or be removed. | Frame type affects the required dimensions, installation labor, flashing, and finishing work. | Insert / Full-frame |
| 5 | Measure the jamb depth | Measure the available depth from the interior stop or finished surface to the exterior stop or mounting surface. | Compare the measured depth with the selected window’s frame and hardware clearance requirements. | Insufficient depth can cause trim conflicts, poor operation, or an installation that does not sit correctly. | Jamb depth |
| 6 | Inspect the sill and surrounding wall | Look for rot, water staining, soft wood, cracks, mold, or damaged sheathing around the opening. | Repair moisture damage and address the source of leakage before installing the new window. | A replacement window cannot reliably correct structural deterioration or ongoing water intrusion. | Condition: Good / Repair |
| 7 | Confirm egress requirements | For sleeping rooms, check the local emergency escape and rescue opening requirements. | Verify required clear opening area, clear opening height and width, sill height, and access conditions with the local authority. | A window that fits the rough opening may still fail required emergency escape provisions. | Local code check |
| 8 | Check safety-glazing locations | Identify glazing near doors, in hazardous locations, and in areas where the bottom edge is close to the floor. | Ask for safety glazing where required by applicable building codes. | Certain locations require glazing designed to reduce injury risk if the glass breaks. | Hazard zones |
| 9 | Review energy-performance needs | Compare U-factor, solar heat gain coefficient, air leakage, visible transmittance, and condensation resistance where listed. | Select performance values suited to the local climate, orientation, shading, and comfort goals. | The right specifications can improve comfort and reduce unwanted heat transfer. | U / SHGC / VT |
| 10 | Confirm installation details | Review flashing, sill-pan treatment, insulation, sealants, drainage paths, interior trim, exterior finish, and debris removal. | Obtain a written scope stating who handles permits, repairs, finishing, and final adjustment. | A clear installation scope helps prevent water-management problems, unexpected costs, and incomplete finishing work. | Written scope |
Measurement note: Record every dimension in the same unit, measure to the nearest practical increment, and verify final sizes against the specific window manufacturer’s installation instructions and applicable local building codes.
Evaluate Contractors, Quotes, Warranties, and Project Timelines
A window replacement project depends heavily on the contractor you choose. Request proof of licensing, insurance, and recent project references before signing anything. A serious contractor should inspect your walls, frames, drainage, and interior trim in person. Phone estimates often miss hidden damage. Ask who will install the windows, not only who prepares the quote. Subcontractors can affect workmanship and communication.
Compare quotes line by line. Each proposal should identify window materials, glass performance, trim work, disposal, permits, and cleanup. A low price may exclude essential repairs. I once saw a quote rise after damaged framing was discovered, so written inspection notes matter. Do not rely on verbal promises. Ask about payment stages, change-order procedures, and the expected completion date.
Read the warranty before approving the project. Check whether it covers glass seals, frames, hardware, labor, and accidental installation damage. Some warranties exclude poor maintenance or unauthorized alterations. Ask whether coverage transfers if you sell the home. The timeline should include ordering, delivery, preparation, installation, inspection, and cleanup. Weather can delay exterior work. Build in a few extra days. Small details matter. Require written updates when dates change, and photograph existing wall or trim damage before work begins. A rushed decision may save money today but create expensive repairs later.
Plan for Installation, Removal, Cleanup, and Final Inspection
10 Tips for Home Window Replacement Buyers
Plan installation around weather, room access, and household routines. The U.S. Department of Energy reports that windows can account for 25–30% of residential heating and cooling energy use. Poor installation can erase much of a high-performance window’s benefit.
Tip: Confirm the crew’s arrival time, work sequence, and expected completion date in writing. Add one spare day. Delays happen.
Before removal, move furniture at least six feet away. Cover floors with rigid protection, not only thin plastic. Ask workers to control dust near air returns and bedrooms. Old frames may reveal damp wood, cracked masonry, or hidden mold-like staining. Stop and document these findings before installation continues.
Tip: Request a removal plan that explains glass handling, debris separation, and disposal. The U.S. Environmental Protection Agency recommends careful renovation practices to reduce household dust exposure, especially in occupied homes.
During installation, inspect the sill, flashing, insulation, and exterior sealant before trim conceals them. The National Fenestration Rating Council emphasizes verified performance ratings, but ratings cannot correct poor field workmanship. Ask for photos behind the finished trim.
Tip: Walk the room before final payment. Check smooth operation, even gaps, secure locks, clean glass, and undamaged screens. Test each window twice.
I once missed a small latch problem because the room looked finished. That was careless. Confirm cleanup includes nails, glass fragments, labels, and removed materials. Keep the inspection notes and warranty documents together.
Related Posts
-
Best Aluminium French Doors at China Import Expo 2026?
-
The Ultimate Guide to Choosing Exterior Front Doors That Enhance Curb Appeal and Energy Efficiency
-
10 Best Exterior Doors to Enhance Your Home's Curb Appeal in 2023
-
How to Choose the Right Residential Windows for Your Home Improvement Project
-

10 Essential Tips for Choosing the Best Window Replacements?
-

Best Home Windows in China for Global Buyers?